Gluten-Free Thumbprint Cookies (Vegan, Allergy-Free)
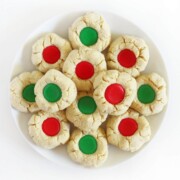
These easy Gluten-Free Thumbprint Cookies are made with a 6 ingredient shortbread-style cookie base, rolled in sugar, and filled with icing! Vegan and allergy-free, these old-fashioned iced thumbprint cookies are a Christmas classic! This quick and simple recipe is perfect for holiday cookie platters and customizable for year-round celebrations!
- Prep Time: 15 Minutes
- Cook Time: 12 Minutes
- Total Time: 27 minutes
- Yield: 13 Cookies 1x
- Category: Dessert
- Method: Bake
- Cuisine: American
Ingredients
- 1 1/4 Cups Gluten-Free All-Purpose Flour
- 1 TB Cornstarch or Arrowroot Starch
- 1/2 Tsp Baking Powder
- 1/4 Tsp Salt
- 1/3 Cup + 1/4 Cup Granulated Sweetener (or preferred granulated sugar)
- 6 TB Vegan Butter (cubed, room temperature)
- 1 Tsp Pure Madagascar Bourbon Vanilla Extract
Icing Filling:
- 1 Cup Powdered Sweetener (or preferred powdered sugar)
- 4-6 Tsp Unsweetened Plain Non-Dairy Milk (or water)
- Natural Food Coloring
Instructions
- Preheat the oven to 350°F.
- In the bowl of a stand mixer or use a large bowl and hand mixer, cream together the soft vegan butter, 1/3 cup of granulated sweetener, and vanilla until smooth and fluffy.
- Add the gluten-free flour, starch, baking powder, and salt to the bowl and mix together on low, increasing the speed slightly until your cookie dough is smooth and combined.
- Have the 1/4 cup of extra granulated sweetener in a bowl or plate and use a cookie scoop or tablespoon to scoop out 1 tablespoon-sized ball of dough, roll them smoothly in your hands before rolling the balls in the sugar before placing them spaced out on a baking sheet lined with parchment paper or a Silpat.
- Use your thumb or the back of a round half-teaspoon measuring spoon to make an indent in the cookie dough balls and flatten them slightly.
- Bake the cookies in the preheated oven for about 12 minutes until the edges are lightly brown.
- Remove the cookies from the oven and immediately use the same round half-teaspoon measuring spoon to deepen and even out the indentation. Allow the cookies to cool for a minute or two on the baking sheet before carefully transferring them to a wire rack.
- In two small bowls, divide the powdered sugar, 1/2 cup in each, and add 7 drops of food coloring to the sugar. Slowly add, 1 teaspoon at a time, non-dairy milk (or water) to the powdered sugar until you get a thick but drippable icing.
- Add 1/2 teaspoon of colored icing to each thumbprint cookie indent. Allow the icing to firm up and dry before serving, about 2-3 hours, preferably overnight.
Notes
Storage: You can store the baked thumbprint cookies in a closed container at room temperature for 3-4 days. You can store them longer in the fridge for up to a week.
Freezing Baked Cookies: If you plan on freezing the cookies fully baked, allow them to cool completely before transferring them to a baking sheet to freeze in a single layer before transferring them to an airtight container or storage bag for up to 4 months. Defrost the cookies in a single layer overnight in the fridge before bringing them to room temperature on the counter to serve.
Freezing Unbaked Cookies: You can also freeze the unbaked cookie dough. Following the instructions but stop after making the the indentations. Place the indented cookies on a baking sheet in the freezer for 1-2 hours. Once the indented dough balls are frozen through, transfer them to a zip-top freezer bag and freeze for up to 4 months. When you’re ready to bake the cookies, place the dough balls on a lined baking sheet and allow them to sit at room temperature while the oven preheats. Add jam if you're using that as your filling before baking the cookies as instructed, adding a minute or two to the baking time if needed.
Nutrition
- Serving Size: 1 Cookie
Find it online: https://strengthandsunshine.com/iced-thumbprint-cookies/